How to Define a Cash Box in BiadaGO
How to Define a Cash Box in BiadaGO
This guide will walk you through the process of defining a cash box in BiadaGO through a series of straightforward steps
Go to cloud.biadago.com
1. Introduction
From accessing the safe deposit box feature to finalizing the creation of the vault, you will be equipped to efficiently manage your cash boxes.
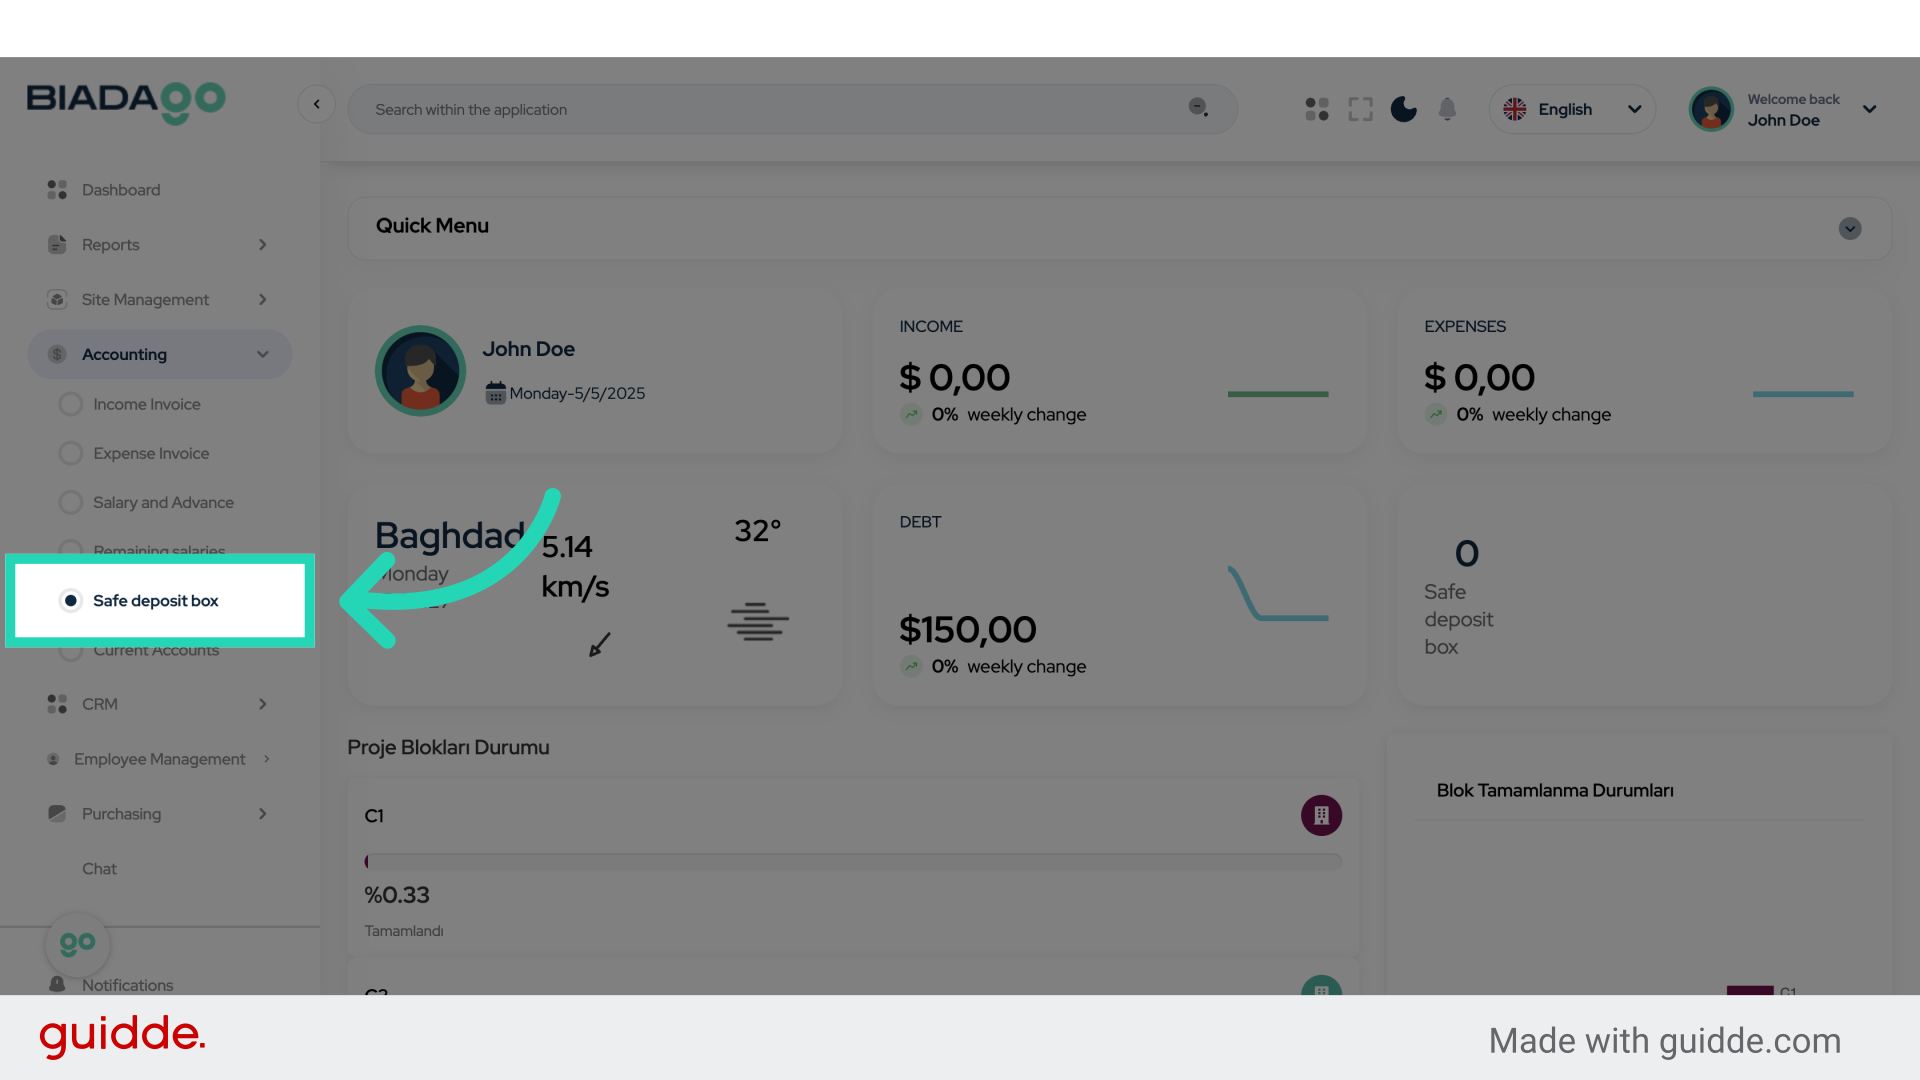
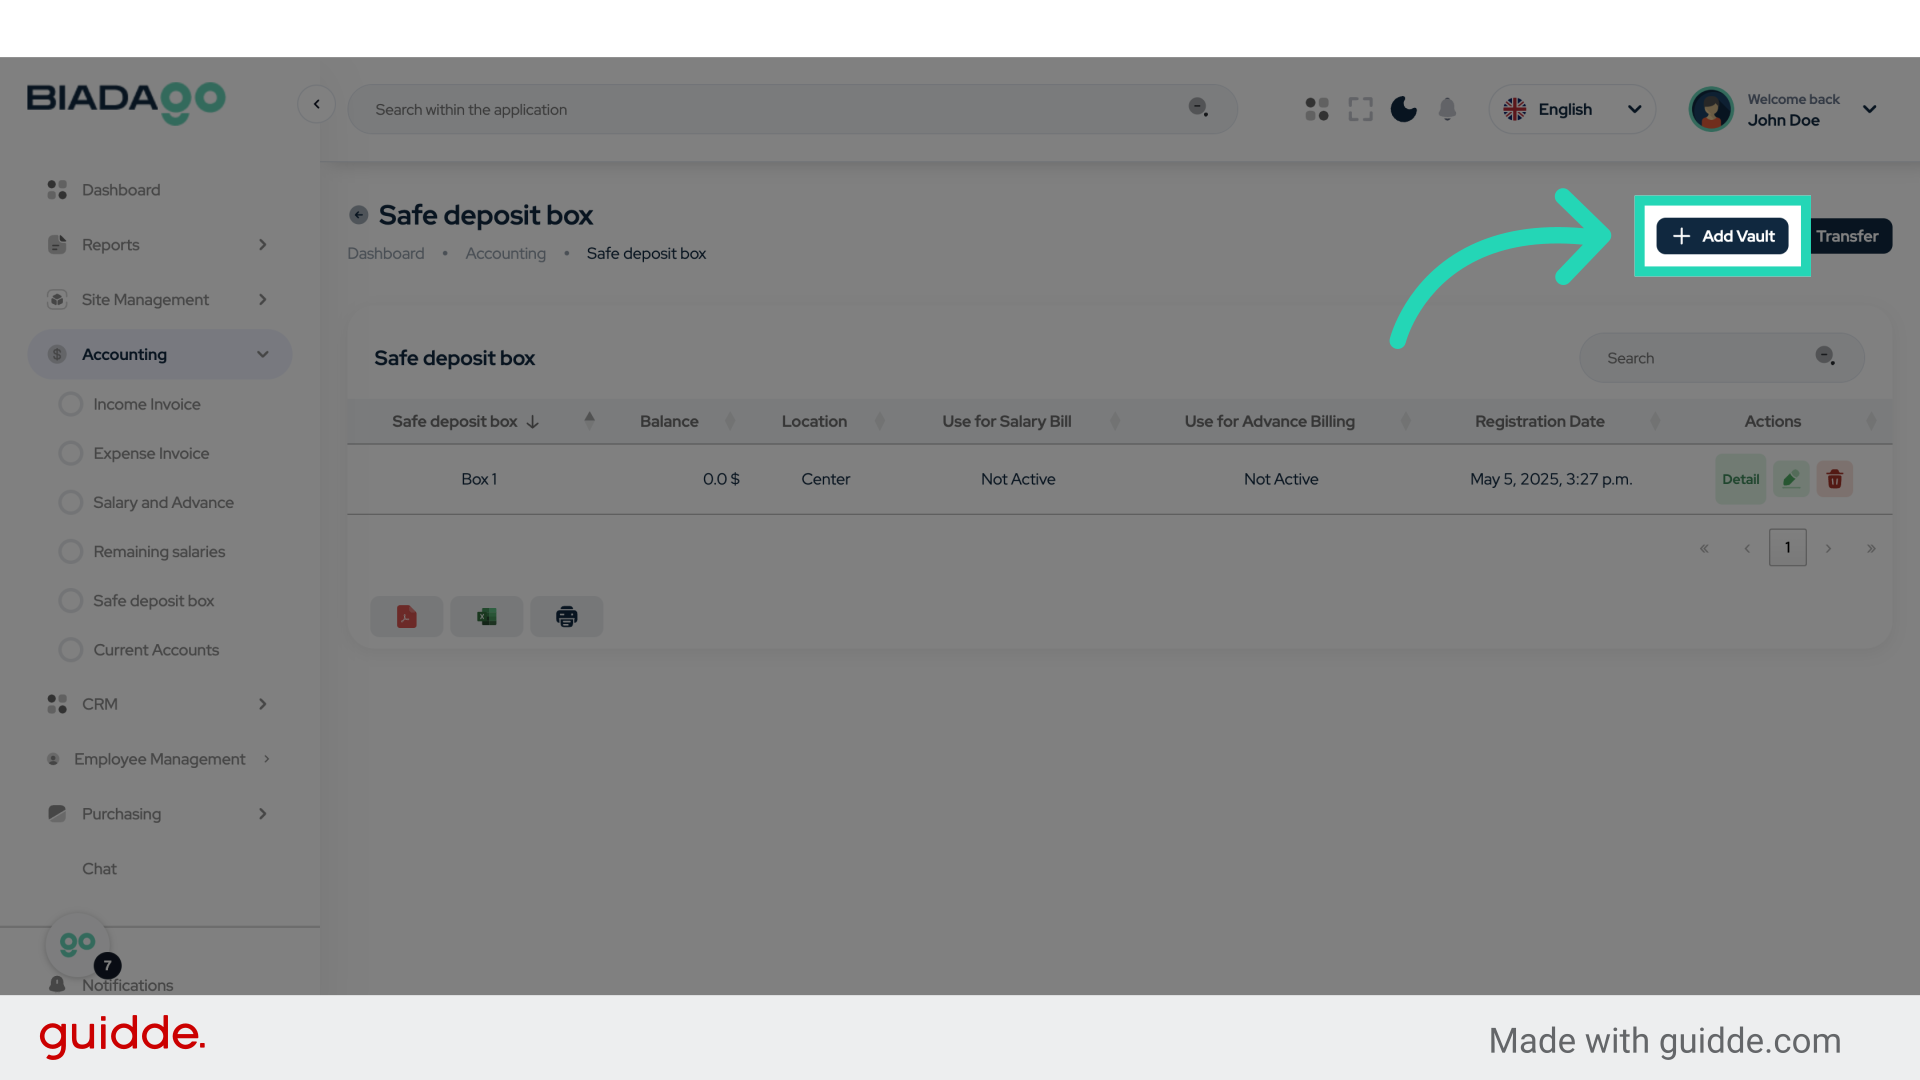
2. Click “Safe deposit box”
Access the safe deposit box feature.
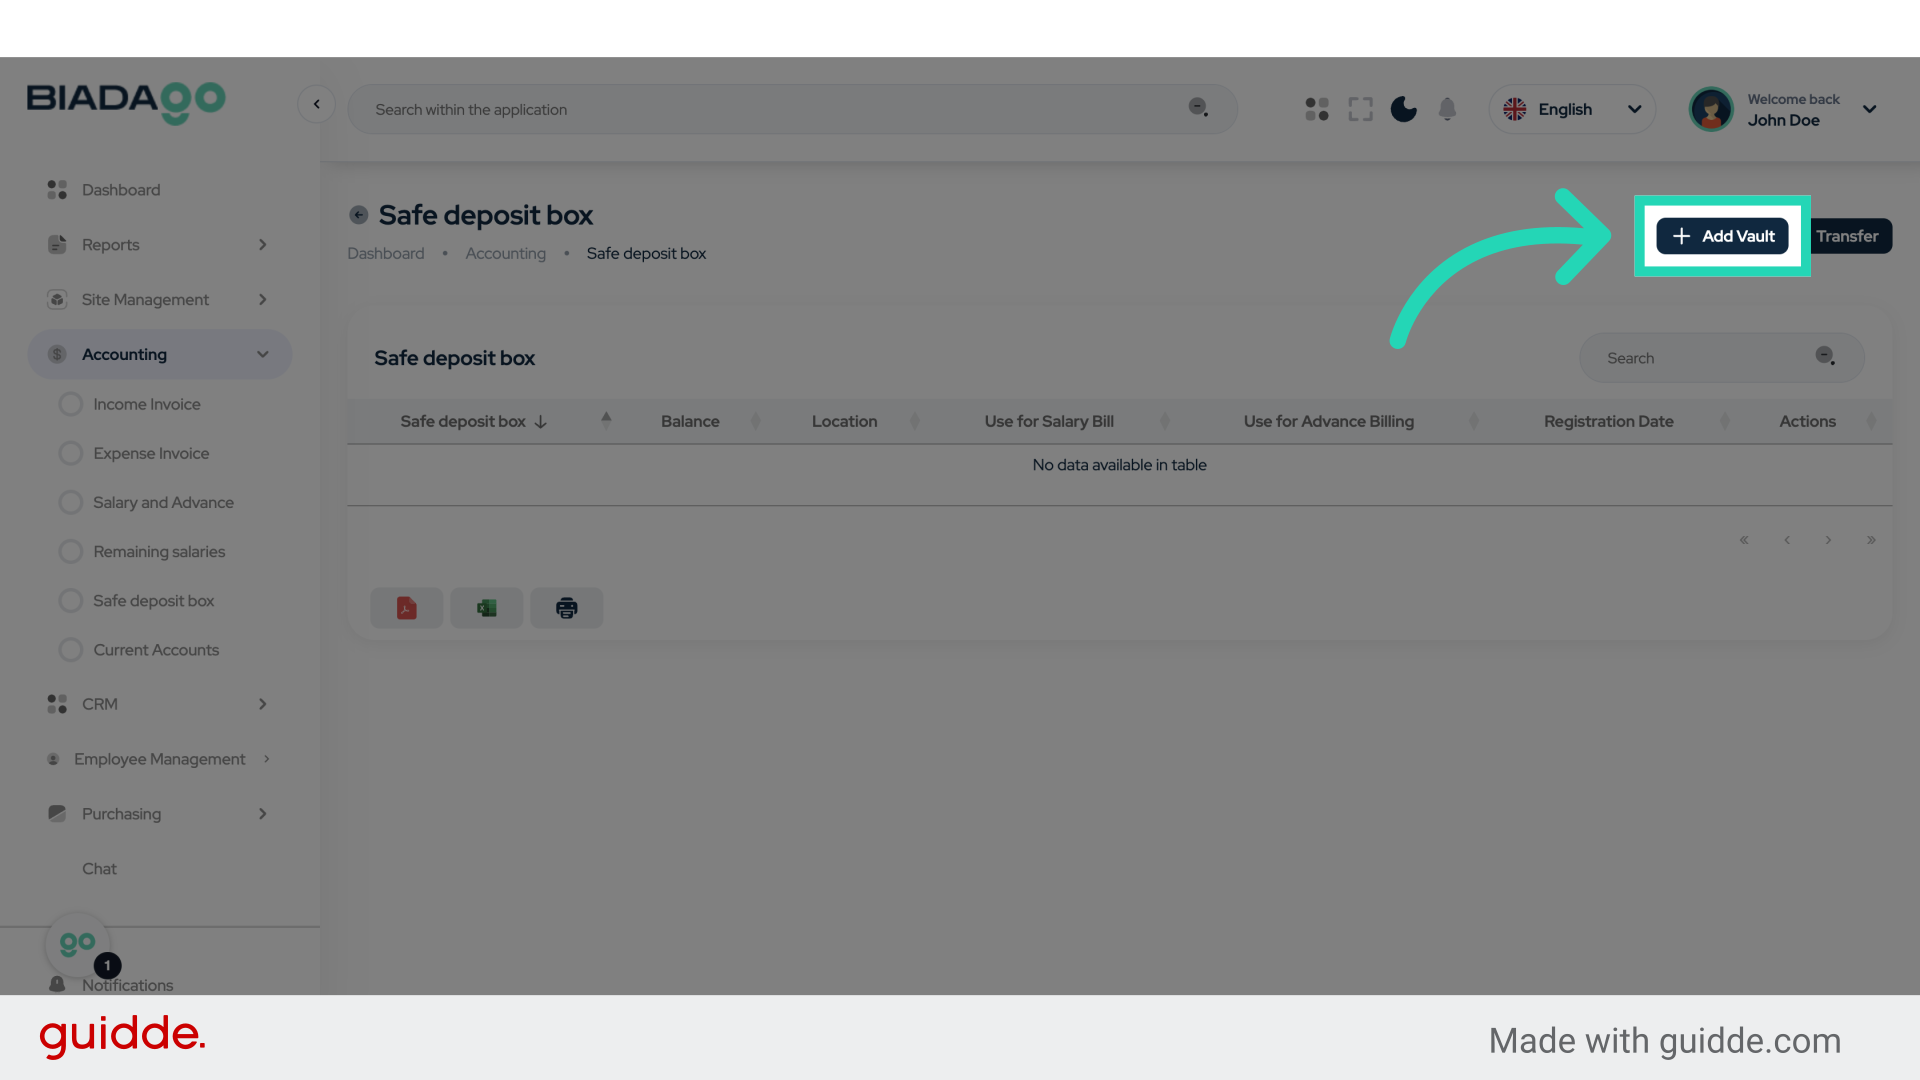
3. Click “Add Vault”
Initiate the process of adding a new vault.
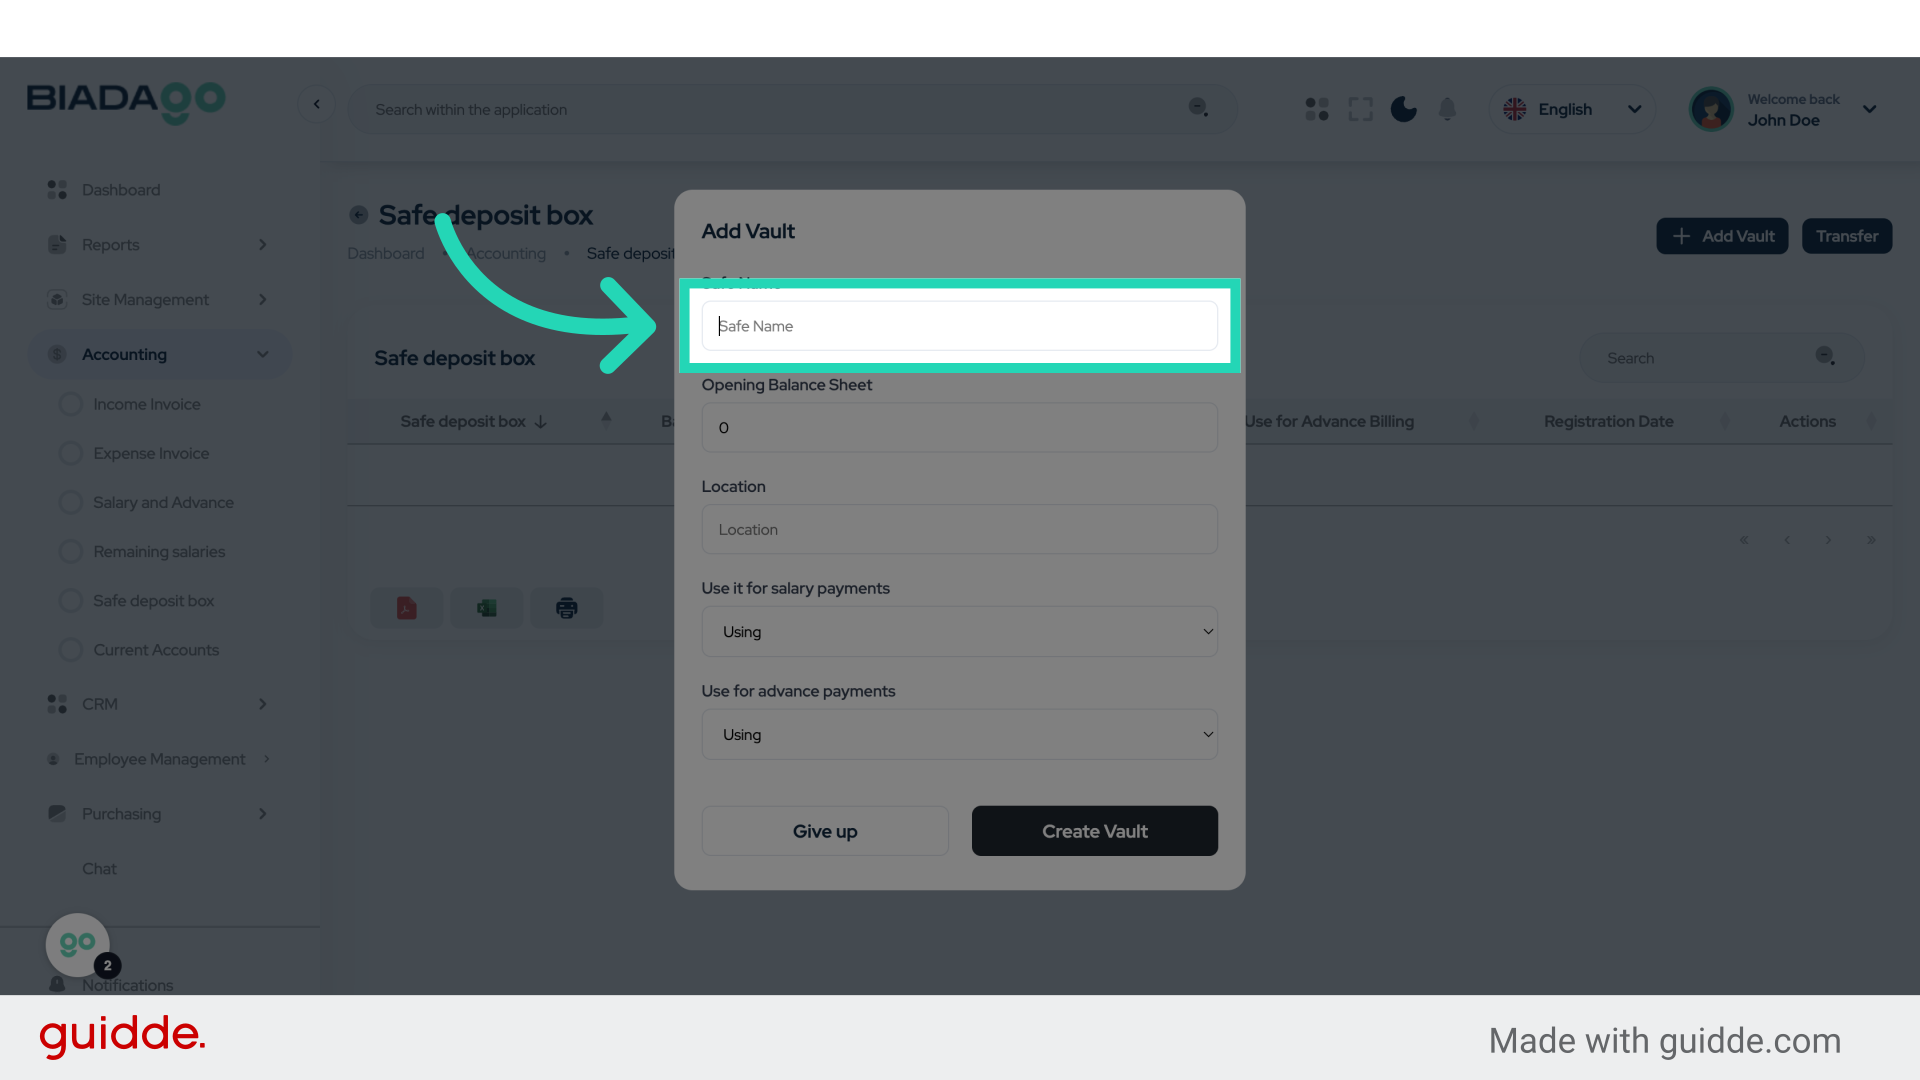
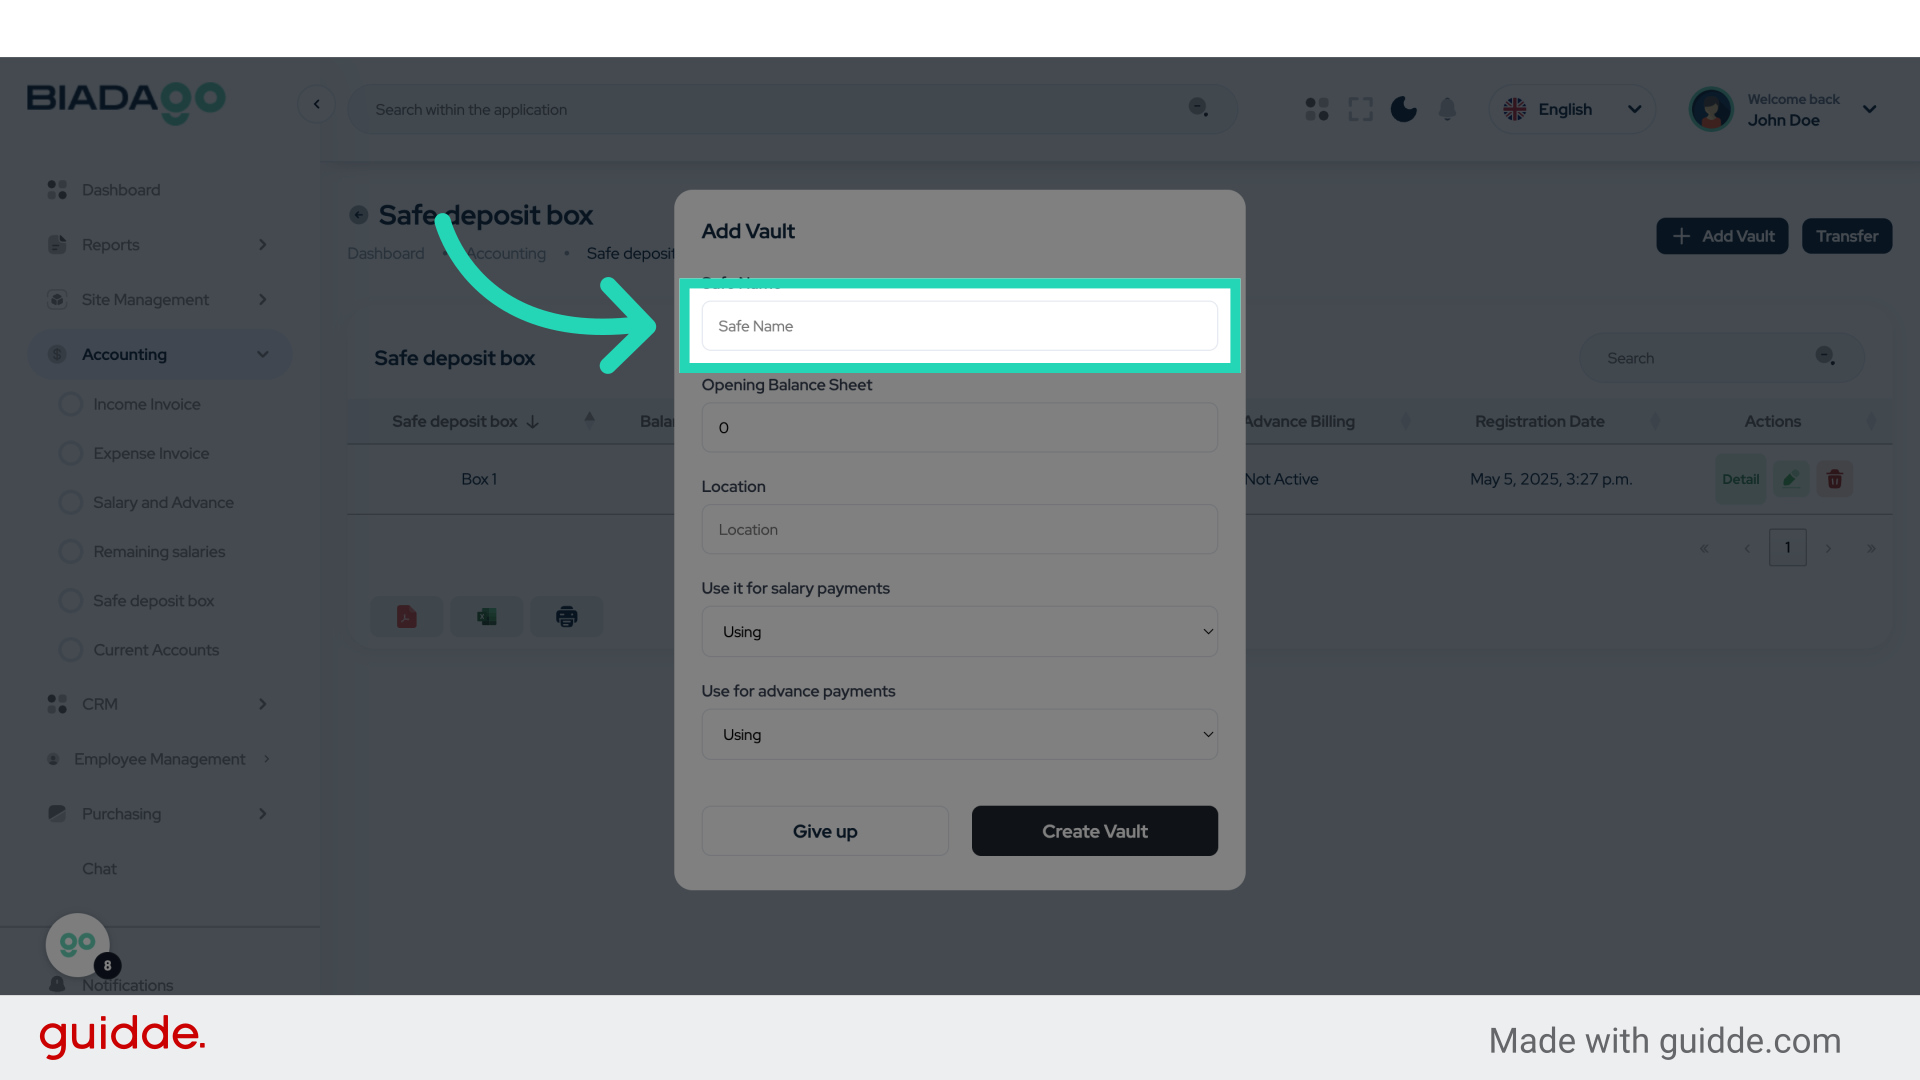
4. Click “Safe Name”
Enter the desired name for the safe.
5. Fill “Box 1”
Fill in “Box 1”

6. Click “Safe Name”
Confirm the name of the safe.
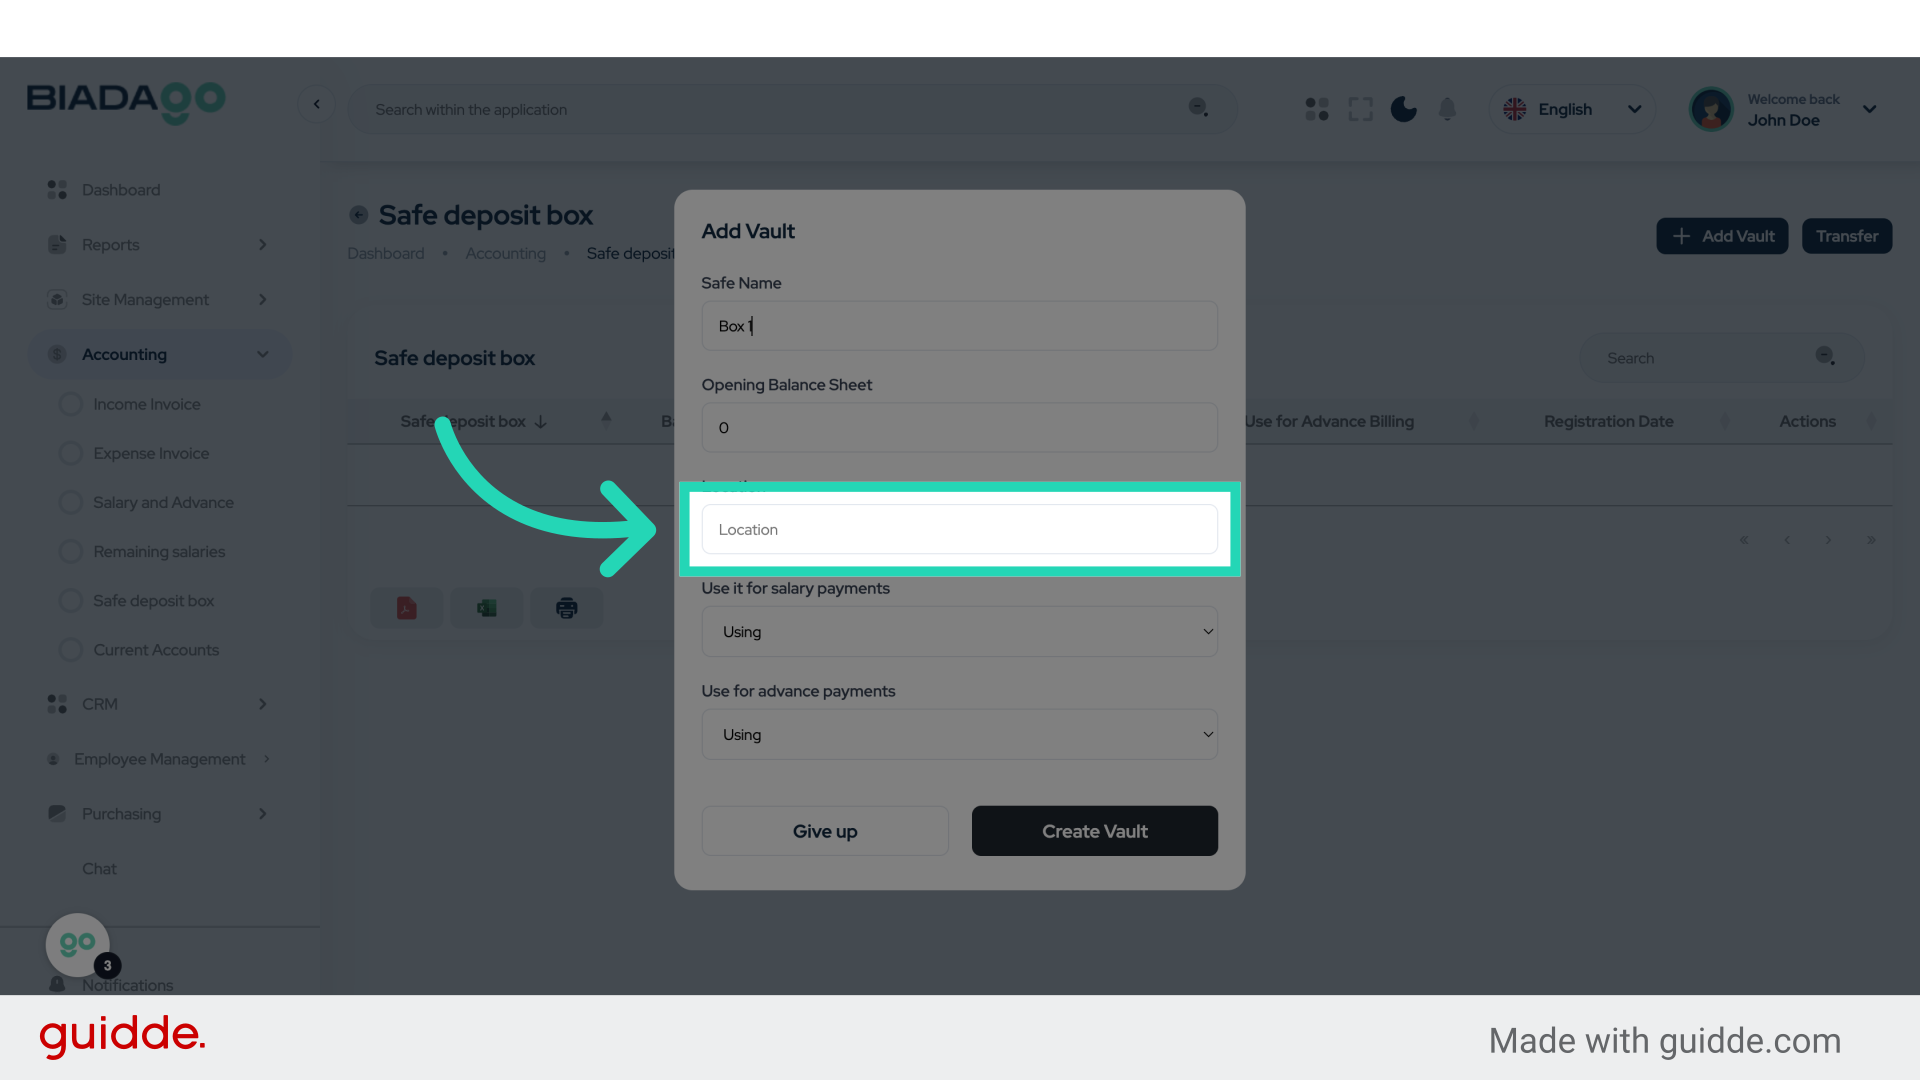
7. Fill “Center”
Enter “Center” in the provided field

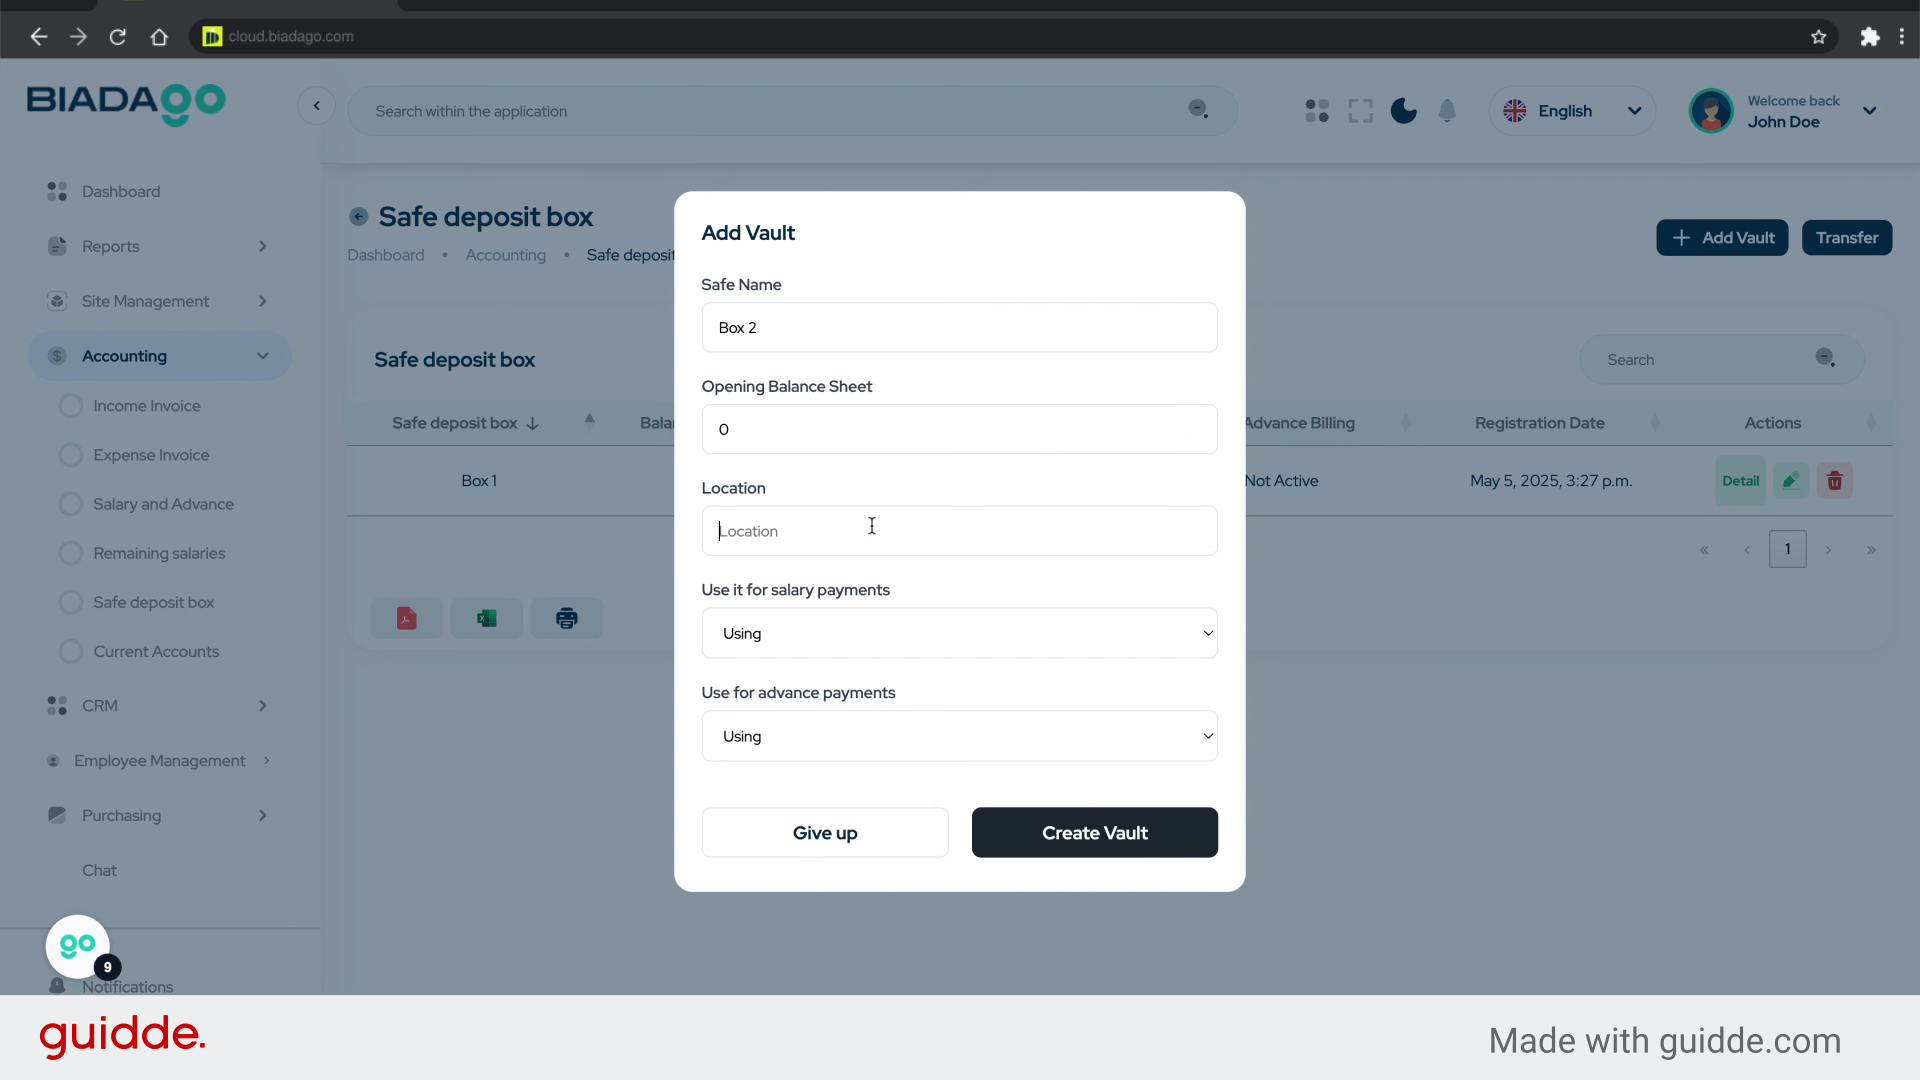
8. Click “Create Vault”
Finalize the creation of the vault.

9. Click “Add Vault”
Add another vault to the system.
10. Click “Safe Name”
Name the new safe.
11. Fill “Box 2”
Fill in the text box with “Box 2”

12. Click “Safe Name”
Validate the name of the safe.
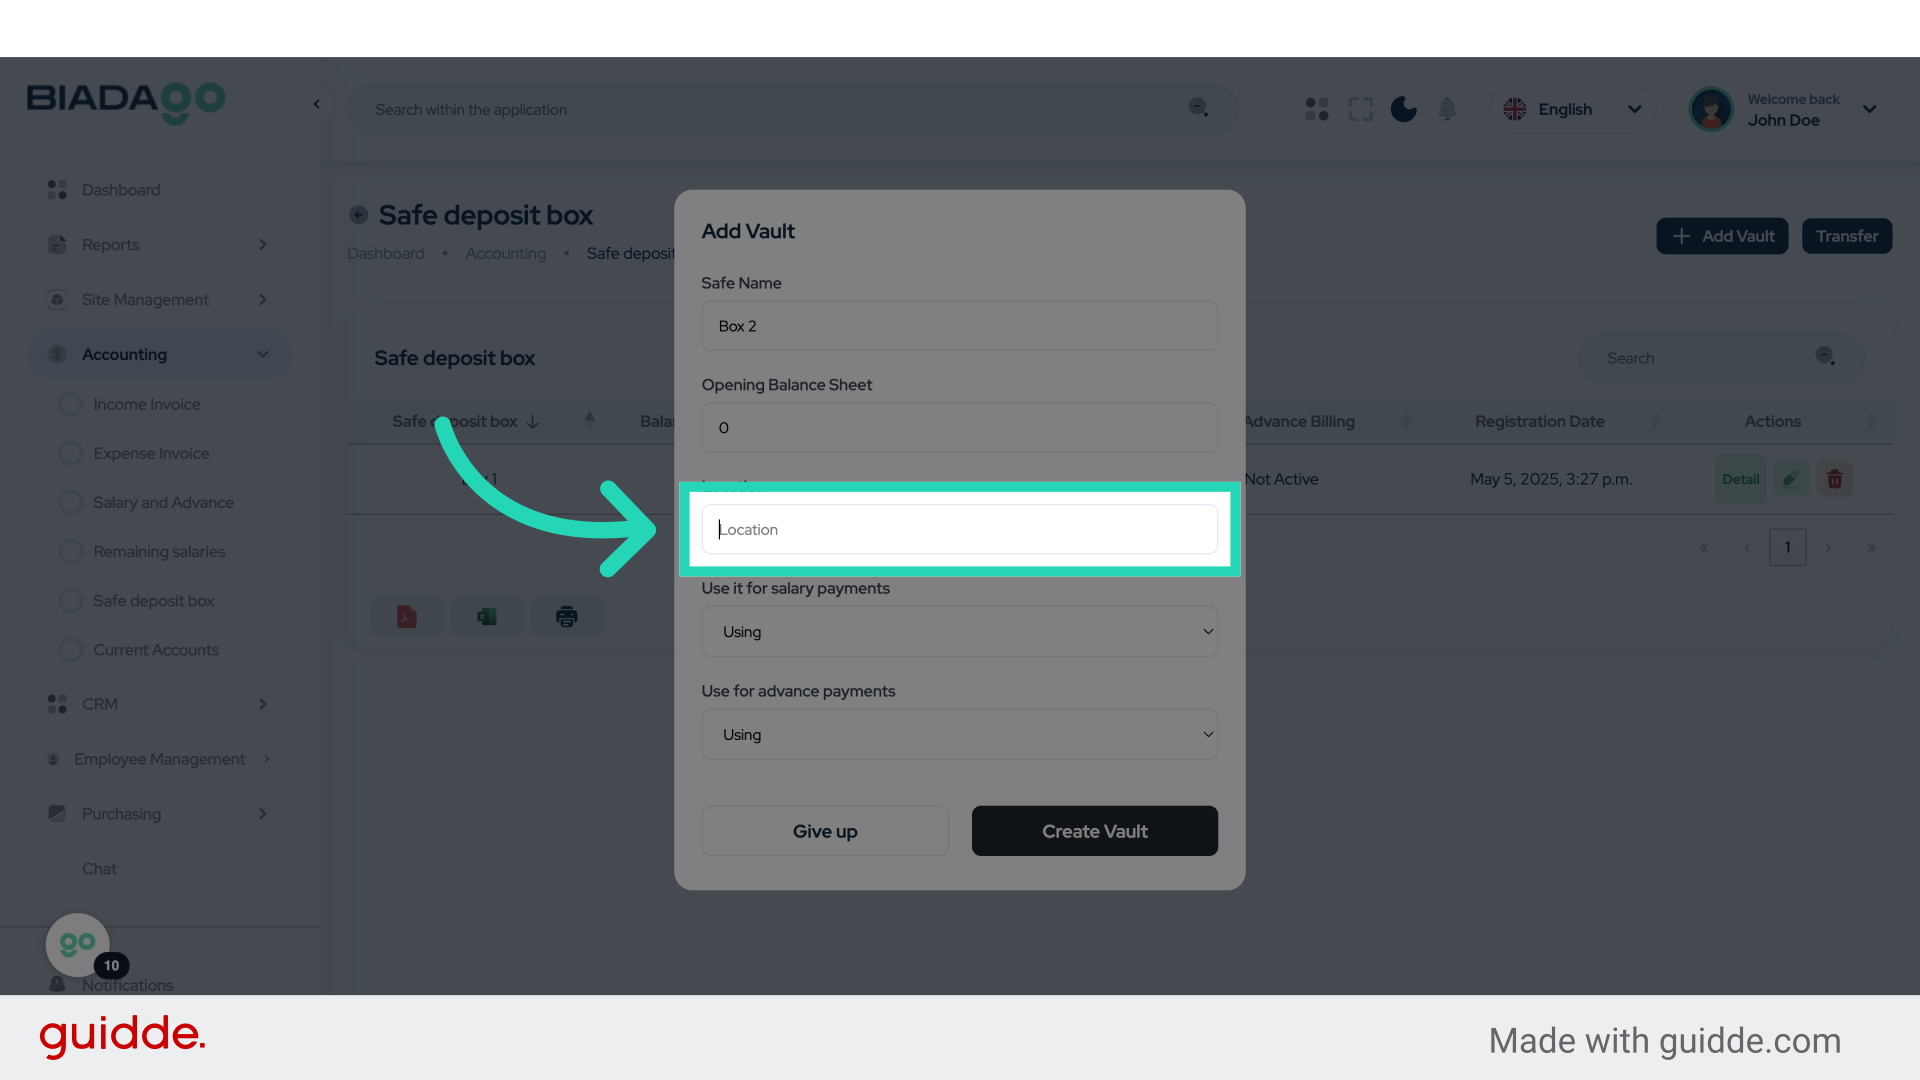
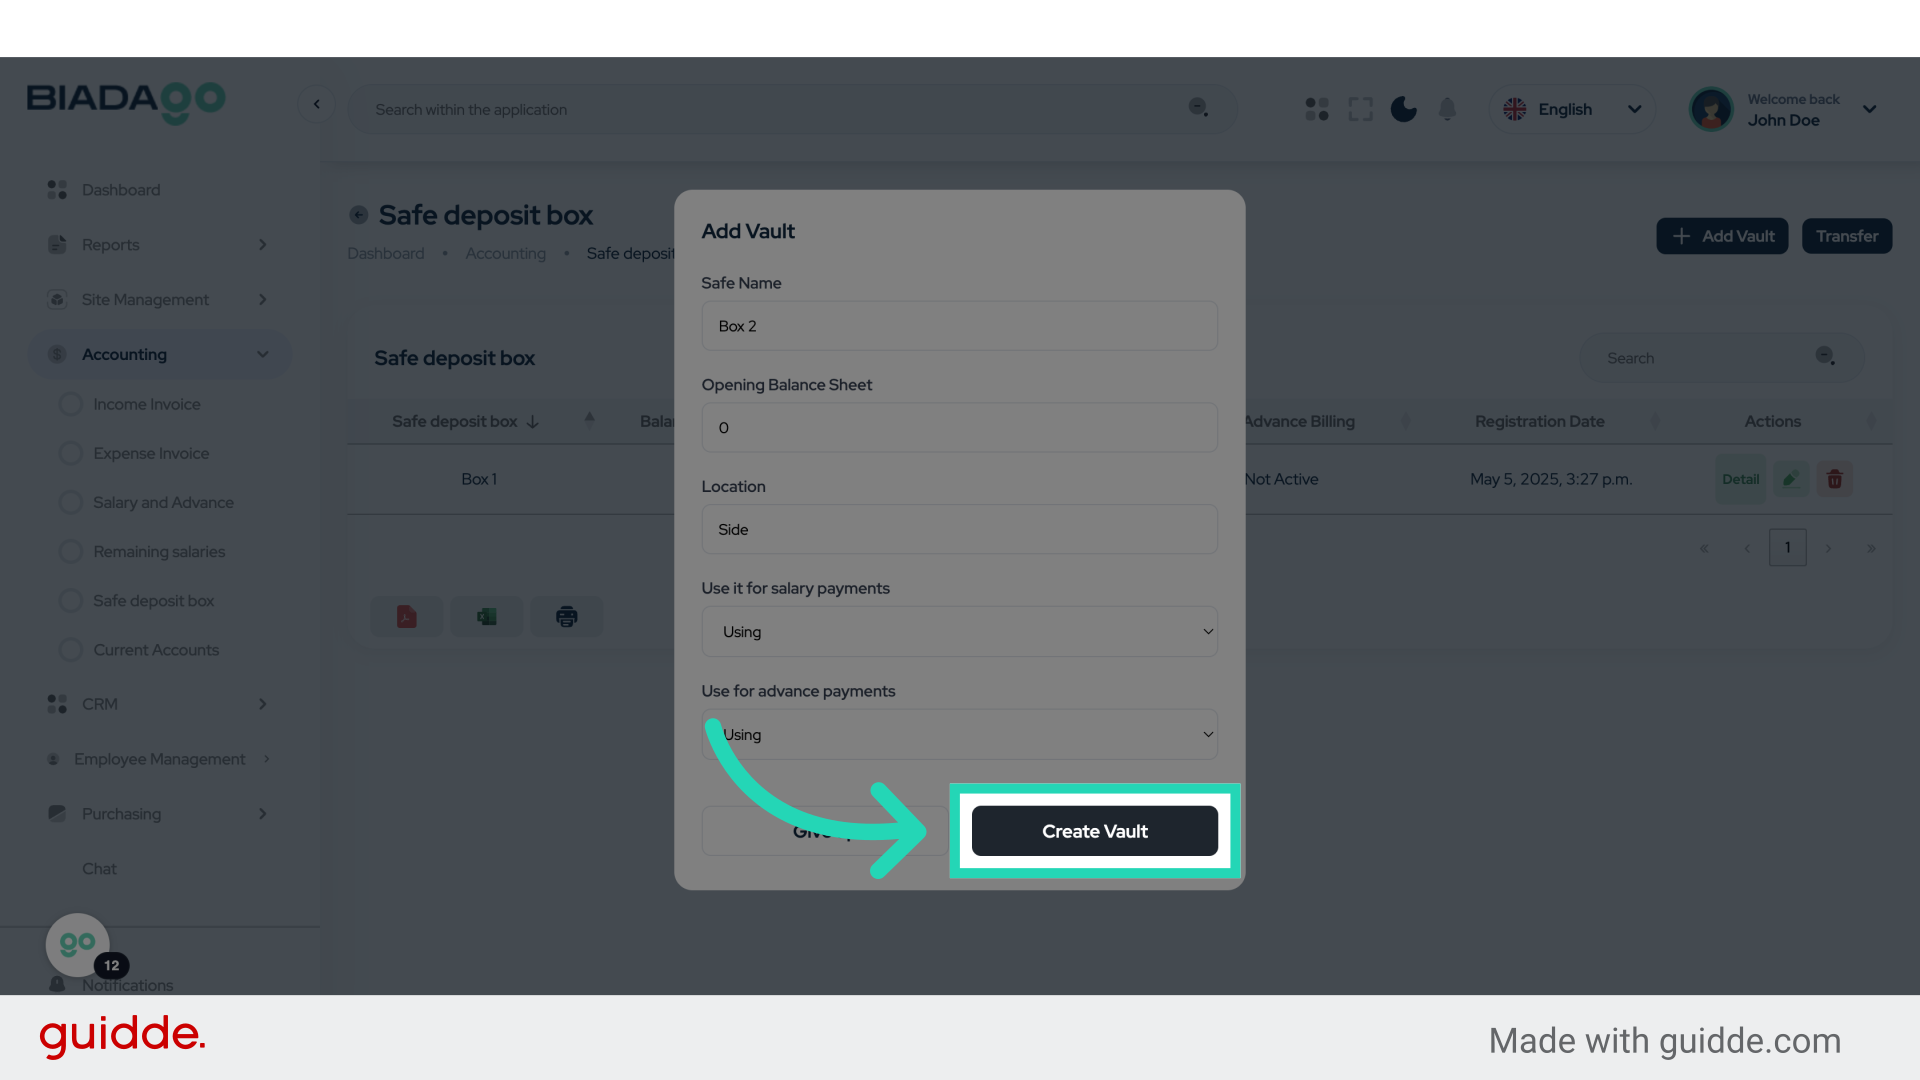
13. Fill “Side”
Enter the desired text.
14. Click “Create Vault”
Complete the vault creation process.
The guide covered the steps to set up a cash box in BiadaGO, including accessing the safe deposit box feature, naming the safe, and finalizing the creation. By following these instructions, users can effectively define and manage their cash boxes within the application.